

Finally out for paint
15th June 2007
Emails have been trickling in asking if I am a) alive and b) still the owner of a cobra kit car. The answer to both is of course a resounding yes, but as you can probably tell I've really struggled this year to give it my full attention. Actually - make that any attention.
The next big step in getting the car finished is to get some lovely blue paint smothered all over it and since my previous attempt at getting it to the bodyshop failed, I kind of got in the mode of not doing much to it until it had been painted. Unfortunately, I've also been extremely slack in sorting that out so here we are in June and only now have I finally waved it off on a trailer.
Before I regale you with that particular saga however, let me update you on the tinkerings I have been doing since my last update in November.
You'll recall that at the end of November I was still waiting for Roger to sort out my exhaust innards and I had ordered the seats and some vinyl trim from Richfield (now called "Interiors Seating" it seems). The plan was to collect the seats and trim mid-December and drop my as-yet-unmade door cards off at the same time to be trimmed and posted back to me.
First thing to do then was to measure up and cut out some door cards. Fortunately Graham had leap-frogged my progress here and already done his and had a spare set of templates that I could borrow - marvellous! I used the templates to cut a rough shape onto some thick card then held that up to the doors and trimmed it to a neat fit. I transferred the outline to some 4mm plywood and attacked it with the jigsaw. I also chopped a section out of the middle as advised by Richfield - apparently if you leave it solid you can't fit very much in the door pockets when it's all trimmed up. A hole in the center allows the pockets to bulge into the void in the door - top tip I thought.
In order to let Richfield fit the poppers that will ultimately hold the cards to the door I needed to drill some small pilot holes around the edge of the cards and through the door. The driver's side was fine, but on the passenger side I discovered on the last hole that the doors actually have a bar of steel bonded into top and bottom edges and in my case they were right where I wanted to drill. 4 test holes and 3 snapped drill bits later I finally found a spot that was just fibreglass.
So now it was decision time - do I cut holes for door handles or do I stick with my super-bling push-button solenoids? It turns out Trevor (who owns a GD) and lives in the same town as me works for a company that makes solenoids. He very kindly lent me a couple to try and see if they were strong enough. After a bit of testing on the bench I decided they probably would be so I left the door cards as they were. Hopefully I won't come to regret this decision!
There still wasn't any sign of my exhaust innards from Roger and as Richfields were also based in Nottingham (they seem to have moved now) I decided to give him a ring and tell him that I'd be popping in to see him while I was up there. Seemed to do the trick as after Graham and I collected our seats and bits from Richfields we went round to Roger's to finally collect the baffles and other mounting bits.
Having finally got all the bits for the exhausts I took my previous set of headers back to Pilgrim and they very kindly agreed to swap them for a set of ETB dials. Pretty good of them actually as it was a good 9 months since I first aquired them.
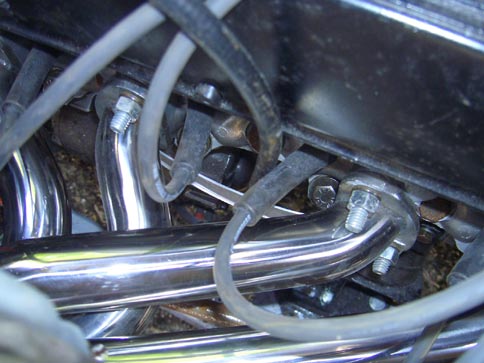
You may remember that I originally borrowed a set of exhausts from Graham to mark up and cut out the holes in the body work. Now it was time to see if I'd really measured correctly and whether the small changes in design Roger had made in the intervening months was going to mean a long night with the fibreglass refilling the giant holes I'd cut. Fortunately, everything lined up fine. The exhausts will sit a little higher than ideal, but they look ok - a big relief.
Inside the engine bay, the way the clutch cable is routed means it rests against the header and would have melted the instant the engine was fired up. So, borrowing yet another tip from Graham I made a small strap to go between two of the studs on the engine block to hold the cable away from the header, but still allow it to move and operate correctly.
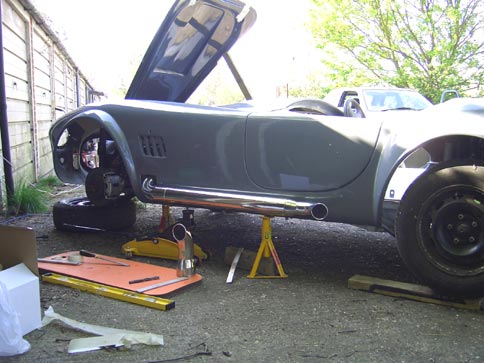
Fast-forward a bit (say four months or so) and I finally got myself organised to send the car for painting. My bodyshop-owning friend John kindly offered to come and collect the car so we organised a weekend for him to come down. Unfortunately, that didn't work out too well as when he went to collect the trailer it wasn't there - not returned by the previous hirer. Booo!
The second attempt the following weekend wasn't much better, on the way to collect the trailer a brake line on the towing car split rendering it useless.
The third attempt, which was this week, involved a towing car, a spare towing car on standby, a trailer and a spare trailer and with all that lined up we finally had success. John arrived around lunchtime and together we winched the cobra onto the trailer and strapped it down. After just an hour he was back on his way with cobra in tow.
So finally, the car is off to be painted. All being well it'll be back in a few weeks with its shiny new paintjob. It'll then be a case of putting all the bits back on and starting to sort out the interior. I'm still hopeful of finishing this summer, but I'm aware I've said that every summer since I started...
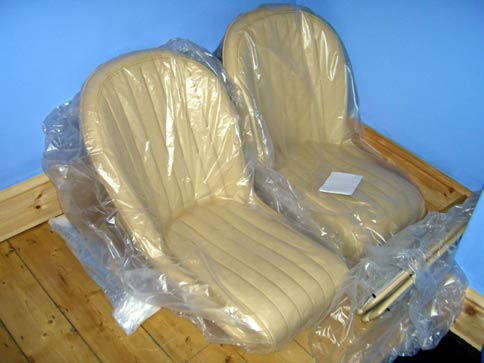
Quality seats
from Richfield

Door card
trimmed up

Exhaust innards
finally sorted
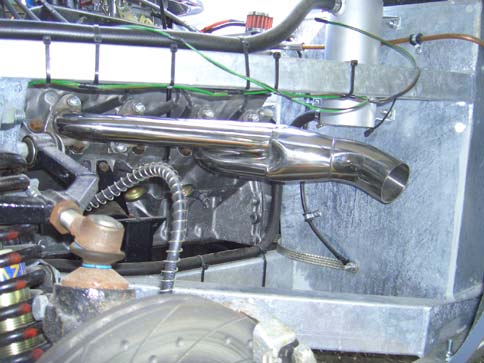
Shiny new headers
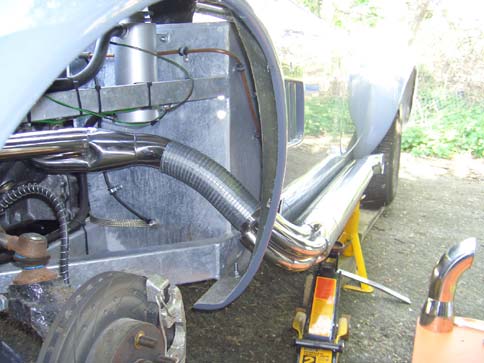
Yay, it lines up!...
...and looks ok
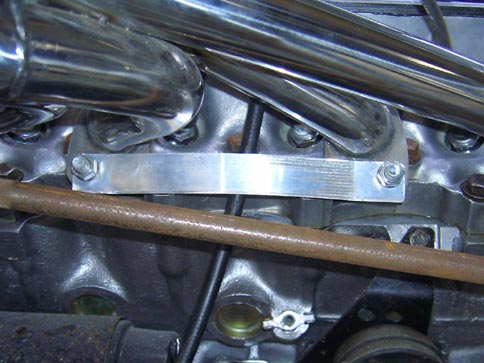
Metal strap for
clutch cable...
...holds cable neatly

Bye bye car!