

Rear end part I
2nd November 2004
With a list of jobs a mile long, you're probably wondering whether it turned out to be a productive weekend of hard mechanical graft or a dull paint-and- polyurethane-fest. Fortunately for everyone, the former turned out to be the case.
Stripping and cleaning the driveshafts was a fairly simple job. In principal I simply left the CV joints intact and removed them from the ends of shafts. I say "in principal", because in practice my circlip pliers weren't able to open the retaining circlips wide enough, so it was a case of getting them started then (ab)using a screwdriver and hammer combo to drive them fully off the shafts. A quick scrub and application of yet more Hammerite (really ought to buy some shares in that company) and they were put back together ready to be fitted.
I didn't attempt to wreck any more bits trying to fit the diff carrier bushes. Instead I phoned a local garage who very helpfully offered the use of their machine press to fit them. The guy seemed a little wary when I mentioned the words "kit car" but after showing him that the diff carrier and bushes hadn't been crafted a) by me or b) out of blu-tack he happily took them out back and came back a little while later with everything fitted together in exchange for a couple of pints worth of folding readies.
Back in my garage the next job was sorting the diff ready for mounting. I have to admit that I didn't inspect it all that closely and having not driven the donor car I am trusting to luck a bit that the differential is in reasonable working order and hasn't got anything fundamentally wrong with it. There certainly doesn't appear to be anything amiss from the outside and the gears appear to have a smooth operation with no play, so I am hoping it will be fine. On Friday I cleaned and painted the casing and left it to dry ready for the weekend.
Mounting the diff on Saturday turned out to be a hard job and definitely one that requires at least two people. While James fitted the carrier to the diff, I started drilling out the excess zinc from the mounting holes on the chassis. This led to a small problem - the drill broke. Actually it was the power cord, which up until that point had been held together by electrical tape and the power of prayer and now it had finally fallen apart. Rather than risk botching it back together we went out and splashed some cash on a newer, more powerful one. Back in the garage the new über drill looked the business right up to the point where I had to re-drill the rear mounting holes. The reinforcing plate on the chassis had been welded on slightly out of place so I had to try and drill through it and the chassis steel to make the holes line up again. The new drill made short work of blunting my drill bit and after trying again with a new drill bit and copious amounts of WD40 we were finally ready to mount the differential.
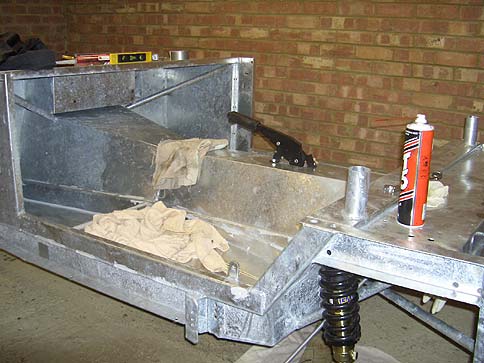
We started by bolting the rear of the diff onto the chassis through the freshly ground holes which was dead easy. However, trying to mount the diff carrier at the front requires lining up two holes on the chassis, the diff bushes themselves and a spacer tube that fits between the bush and the chassis. I can see why Mark Evans resorts to a crow bar to get all the pieces to fit. In our case we managed to get one side on with some struggling which left the other side all of about 2mm out of alignment. In the end we resorted to James hanging off one side of the chassis pushing it sideways with his feet while I pulled it and "persuaded" the bolt into place with a hammer. There'd better be nothing wrong with it - it's not coming off again!
Prior to mounting the diff, we put the handbrake on. A simple job just bolting the cable carrier to the base of the handbrake and then bolting the handbrake to the chassis. Looking at the cable we couldn't figure out how you would actually get any tension in it. It turns out subsequently you're not supposed to just leave them trailing, but insteads the adjuster nuts fit onto the chassis at the back of the transmission tunnel (see picture). This isn't explicitly stated in the manual, which I think is a bit of a glaring omission because it's not immediately obvious to a novice such as myself! As a final job we bolted the rear suspension struts to the chassis, but ran out of time to fit any more of the rear parts.
This week I haven't really progressed much further. I had a go at setting the front camber, but gave up after I couldn't get the balljoints to fit snugly. I also found that zero degrees on each side required a totally different amount of adjustment to the top balljoints, which didn't seem right at all. Having thought about it again I realised that the chassis itself wasn't sitting anywhere near level, so I need to jack it up temporarily on one side while I set the camber.
I didn't get round to ordering the replacement bolts and washers for the driveshafts, so that's a job for this week. Once I have those I'll be able to complete the rest of the rear suspension and then it'll be onto brakelines and steering column. I need to start thinking about ordering an engine too as it doesn't seem like it will be long before I'm ready for that. I know Pilgrim will supply a reconditioned Rover V8 and gearbox for £2800 and looking at RPI's website they look like they're about the same. I'm sure there must be other reputable suppliers (please email me if you can recommend anyone!) and of course there is always the option of buying a scrap engine and rebuilding it myself.
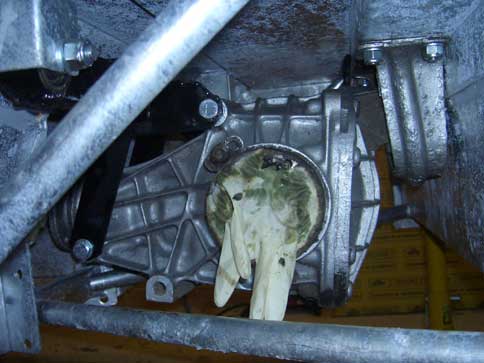
The differential in its new home
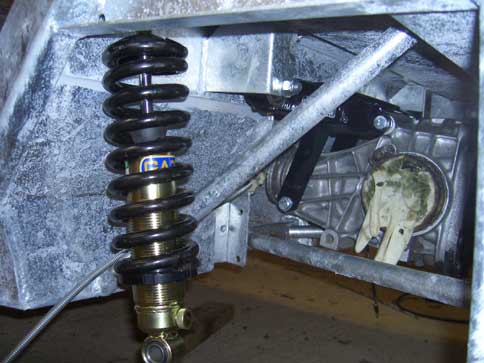
The rear suspension,
or at least the
beginnings of it
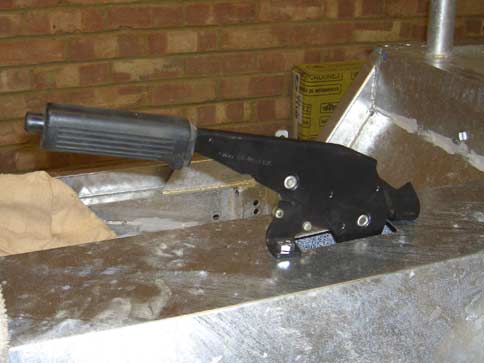
Will come in
useful later on
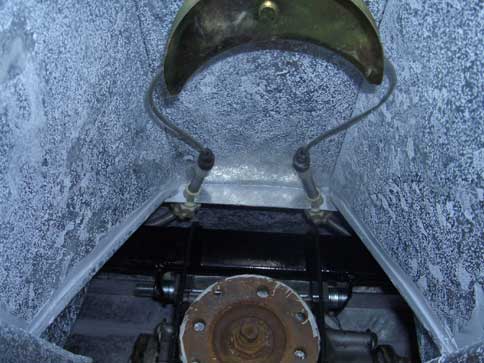
The missing image from the build manual
How the chassis currently looks